


 You’ve written your memoir or nonfiction book. You’ve poured your expertise, your story, your heart onto the page. And now you’re facing a decision that feels both exciting and terrifying: narrating your own audiobook.
Here’s a nugget of truth for you: you should absolutely narrate your own book. Not because you have a radio voice or acting experience, but because your voice carries something no professional narrator can replicate—authenticity. When readers choose a memoir or nonfiction book, they’re not just buying information. They’re buying connection with you, the author. Your voice, with all its imperfections and personality, is part of that connection.
But I know what you’re thinking. You’re not an actor. You’ve never done voice work. The idea of sitting in front of a microphone for hours sounds overwhelming. Maybe you’ve listened to professionally narrated audiobooks and wondered how you could possibly measure up.
Take a breath. You don’t need to sound like a professional narrator. You need to sound like yourself, only better. And that’s completely achievable with the right approach and some practical narration tips and techniques.
Why Your Voice Matters
Before we dive into the technical stuff, let’s talk about why you’re the right person to narrate your book, even if you’ve never done this before.
When someone listens to your memoir, they want to hear your story in your voice. They want the pauses where you would naturally pause. They want the emphasis you would naturally place on certain words. They want the emotion that comes from someone who lived the experience, not someone reading about it.
For nonfiction authors, your voice establishes credibility in a way a hired narrator simply can’t. You’re not just reading information. You’re teaching, guiding, sharing expertise you’ve earned through experience. That authority comes through in subtle ways—the confidence in your tone when discussing your area of expertise, the passion when you talk about concepts that matter to you, the natural rhythm of how you explain complex ideas.
Professional narrators are skilled at bringing fiction to life, creating distinct character voices, and maintaining energy through long narratives. But your book isn’t fiction. It’s you. And nobody can be you better than you can.
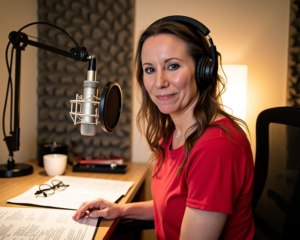
Setting Up Your Recording Space
You don’t need a professional studio to create a quality audiobook. What you need is a quiet space with good sound characteristics. The biggest enemy of audiobook recording isn’t lack of professional equipment—it’s background noise and echo.
Start by finding the quietest room in your house. Close the windows. Turn off fans, air conditioning, and heating if possible. Silence your phone. Put a sign on the door. Tell your family this is recording time. These seem like obvious steps, but you’d be surprised how many recording sessions get derailed by a barking dog, a ringing doorbell, or a spouse who forgot you were recording.
Now listen to your space. Clap your hands. Do you hear echo? Hard surfaces like walls, windows, and hardwood floors create echo that makes your recording sound hollow and unprofessional. The solution is soft surfaces. Hang blankets or moving blankets on walls. Record in a room with carpet, curtains, and upholstered furniture. Some authors record in their closets surrounded by hanging clothes, which works surprisingly well.
If you’re setting up a dedicated recording space, consider acoustic foam panels. They’re not expensive and they make a noticeable difference. But honestly, blankets and pillows strategically placed can work almost as well.
Your microphone doesn’t need to cost thousands of dollars, but it should be better than your laptop’s built-in mic. A USB condenser microphone in the $100-200 range will serve you well. Popular options include the Audio-Technica AT2500USBx or the Blue Yeti. These plug directly into your computer and produce quality that meets audiobook distribution standards.
Position your microphone about six to eight inches from your mouth, slightly off to the side rather than directly in front. This reduces plosives—those popping sounds that happen with P and B sounds. A pop filter, that circular screen you see in recording setups, helps even more. They cost about $10 and make a real difference.
Preparing Your Manuscript
Reading aloud is completely different from reading silently. Before you start recording, you need to prepare your manuscript for narration.
Print your manuscript or have it on a tablet where you can easily see it without making noise. Turning paper pages creates sound that your microphone will pick up. If you’re using paper, consider putting pages in sheet protectors to reduce rustling.
Read through your entire manuscript aloud before you record a single word. This seems time-consuming, but it’s essential. You’ll discover sentences that look fine on the page but are impossible to say smoothly. You’ll find tongue twisters you didn’t know you’d written. You’ll notice places where you naturally want to pause but there’s no punctuation to guide you.
Mark up your manuscript. Use a highlighter or digital annotations to note where you want to emphasize words, where you need to slow down, where you should pause for effect. Mark difficult words or names and practice saying them until they flow naturally.
Pay special attention to numbers, dates, and technical terms. Decide in advance how you’ll handle them. Will you say “two thousand twenty-five” or “twenty twenty-five”? Will you spell out acronyms the first time they appear? These decisions should be consistent throughout your book.
Developing Your Narration Voice
Your narration voice isn’t your everyday speaking voice, but it’s not a performance voice either. It’s your speaking voice with intention and energy.
The biggest mistake new narrators make is reading in a monotone. When you read silently, your brain adds inflection and emotion automatically. When you read aloud, you have to consciously add those elements. This doesn’t mean being dramatic or over-the-top. It means being engaged with your own material.
Think about how you’d tell this story to a friend over coffee. You’d naturally emphasize certain words. You’d pause for effect. Your voice would rise and fall with the emotional content. That’s the energy you want to bring to your narration.
Practice reading a paragraph multiple ways. Try it flat and monotone. Then try it with exaggerated emotion. The sweet spot is somewhere in between—natural but engaged, conversational but clear.
Pace matters more than you think. New narrators tend to read too fast, rushing through material they know well. Slow down. Audiobook listeners need time to process information, especially complex ideas or emotional moments. A good pace feels almost too slow when you’re recording, but it’s perfect for listeners.
Breathing is part of your narration. Don’t try to eliminate all breath sounds—they make you sound human. But do learn to breathe quietly and at natural pause points. Practice breathing through your nose between sentences rather than gasping through your mouth.
Managing Your Voice and Energy
Recording an audiobook is physically demanding. Your voice is a muscle, and you’re about to use it in ways you probably haven’t before.
Start with short recording sessions. Thirty minutes to an hour is plenty when you’re beginning. Your voice will tire faster than you expect, and tired voice sounds different. Listeners can hear when you’re straining or losing energy.
Warm up your voice before recording. Hum. Do lip trills. Read a few paragraphs aloud before you hit record. Drink room temperature water—cold water can tighten your vocal cords.
Stay hydrated, but avoid dairy products before recording. They create mucus that affects your voice. Skip the coffee too—it’s dehydrating. Room temperature water with a little lemon is your friend.
If you feel your voice getting tired, stop. Don’t push through. You’ll end up with recordings that don’t match the quality of your earlier sessions, and you’ll potentially strain your voice. It’s better to record in multiple short sessions than to force one long marathon.
Pay attention to your posture. Sit up straight or stand while recording. Slouching compresses your diaphragm and affects your voice quality. Some narrators prefer standing because it gives them more energy and better breath control.
Handling Mistakes and Retakes
You will make mistakes. You’ll stumble over words, lose your place, cough, hear a noise in the background. This is completely normal and expected.
Here’s the secret professional narrators use: they don’t try to record perfectly the first time. They record in takes, stopping and restarting whenever needed.
When you make a mistake, don’t panic. Stop, take a breath, back up to the beginning of the sentence or paragraph, and start again. Leave a few seconds of silence, or even have a keyword you say before you start again—this makes it easier to find and edit later.
Some narrators clap or snap their fingers when they make a mistake. This creates a visual spike in the audio waveform that’s easy to spot during editing. Others just leave a longer pause. Find what works for you.
Don’t try to edit as you go. Just keep recording, making notes of any sections you want to review later. You can fix everything in post-production.
Mouth noises—clicks, smacks, saliva sounds—are the bane of audiobook narration. Stay hydrated to minimize them. If they’re persistent, try eating a green apple before recording. The acidity helps reduce mouth noise. Weird but true.
Recording Workflow and Consistency
Develop a consistent recording routine. Record at the same time of day when possible. Your voice sounds different in the morning versus evening, and you want consistency throughout your book.
Before each session, record a few seconds of room tone—just silence in your recording space. This is useful during editing for filling in gaps or smoothing transitions.
Start each recording session by reading the last paragraph from your previous session. This helps you match your energy and tone, and it gives you a warm-up before diving into new material.
Keep detailed notes. Mark which chapters or sections you’ve recorded, which takes you prefer, any issues you noticed. This seems tedious but saves enormous time during editing.
Aim for consistency in your distance from the microphone, your volume, and your energy level. Listeners shouldn’t be able to tell where one recording session ended and another began.
Technical Considerations
You don’t need to be an audio engineer, but you should understand some basics.
Record in a lossless format like WAV at 44.1kHz sample rate and 16-bit depth. These are standard audiobook specifications. Most recording software lets you set this up once and forget it.
Monitor your recording levels. Make the wave form (the colored output of your recording) visible as you record. Your audio should peak around -6dB to -3dB. Too quiet and you’ll have to boost it later, adding noise. Too loud and you’ll get distortion. Most recording software shows you levels in real-time. Watch them as you’re recording.
Use a simple recording program to start. Audacity is free and works well for audiobook recording. GarageBand if you’re on a Mac. You don’t need expensive software for quality results.
Save your work frequently. Create backups. Nothing is worse than losing hours of recording to a computer crash.
Editing and Post-Production
Editing your audiobook is where good recordings become great. You’ll remove mistakes, reduce background noise, normalize volume levels, and create a polished final product.
If editing feels overwhelming, this is where you might want to hire help. A professional audiobook editor can take your raw recordings and turn them into distribution-ready files. This is often worth the investment, especially for your first audiobook.
If you’re editing yourself, learn the basics of your editing software. You’ll need to know how to cut and delete sections, adjust volume, reduce noise, and export in the correct format.
ACX (Amazon’s audiobook platform) and other distributors have specific technical requirements. Your files need to meet standards for noise floor, peak levels, and RMS (average volume). There are free tools that can analyze your files and tell you if they meet these standards before you upload.
The Emotional Challenge
Here’s something nobody talks about enough: listening to your own voice for hours while editing is emotionally challenging. You’ll hate how you sound. You’ll notice every imperfection. You will get so incredibly tired of hearing your own voice in your head. You’ll wonder why anyone would want to listen to you.
This is normal. Everyone feels this way about their recorded voice. Push through it. Your listeners don’t hear what you hear. They hear authenticity, expertise, and connection.
Recording your memoir can be especially emotional. You’re not just reading words—you’re reliving experiences. Give yourself permission to take breaks when you hit difficult sections. It’s okay to cry, to pause, to need a moment. That emotion, when it comes through in your narration, creates powerful connection with listeners.
Practice and Improvement
Your first chapter won’t be your best. That’s okay. You’ll improve as you go. Your voice will get stronger. Your pacing will get better. You’ll develop a rhythm and confidence.
Some authors record their first chapter, then come back and re-record it after they’ve finished the rest of the book. By then, they’ve found their narration voice and can make that first chapter match the quality of the rest. I did this and I definitely feel like it was a good move for my memoir.
Listen to audiobooks in your genre. Pay attention to pacing, tone, and energy. You’re not trying to copy professional narrators, but you can learn from how they handle similar material.
Record practice sessions. Read a chapter and listen back. What do you like? What would you change? This feedback loop is how you improve.
When to Consider Help
You don’t have to do everything yourself. Many successful author-narrated audiobooks involve collaboration.
Consider hiring a professional for editing and mastering even if you do your own narration. This ensures your final product meets technical standards and sounds polished.
If you have dialogue or quoted material in your book, you might bring in another voice for those sections. This adds variety and can make quoted material clearer for listeners.
Some authors work with a voice coach for a few sessions to develop better technique. This can be especially helpful if you’re struggling with pacing, breathing, or vocal fatigue.
The Reward
Recording your own audiobook is hard work. It’s time-consuming and sometimes frustrating. But it’s also deeply rewarding.
When you finish, you’ll have created something unique—your words in your voice, preserved forever. You’ll have given your readers a way to connect with you that goes beyond the page. You’ll have proven to yourself that you can do hard things.
Your voice might not be perfect. Your narration might not be as polished as a professional’s. But it will be authentic. It will be you. And for your readers, that’s exactly what they want.
How I Can Help
If you’re ready to turn your manuscript into an audiobook but feeling overwhelmed by the technical side, I’m here to help. Mount Cooper Publishing offers audiobook mastering services that take your raw recordings and turn them into distribution-ready files that meet ACX and Voices by INaudio standards.
I’ve been through this process myself—I narrated and produced my own memoir audiobook. I know the challenges you’re facing because I’ve faced them too. Whether you need full production support or just someone to handle the technical editing while you focus on narration, I can help you get your audiobook out into the world.
Your voice matters. Your story deserves to be heard. Let’s make it happen together.